One of the great perks of my job at Visa Labs is that I get to use 3d printers every day. In my office, we have 4 printers that I have used extensively. This post is a review of my experiences with these printers.
Flashforge Creator ($977)
5 Stars
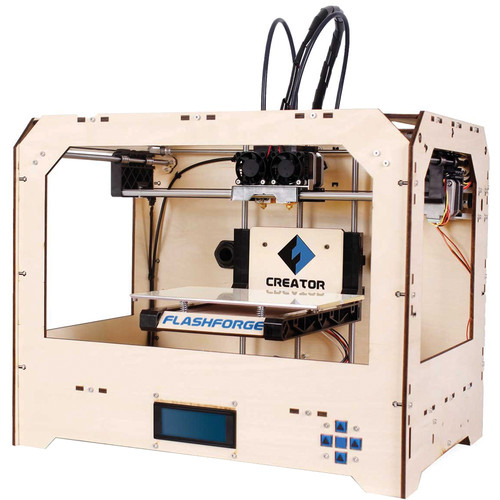
The Flashforge Creator is the first printer we received and has proven to be the most reliable, fastest, easiest to repair and simplest to use printer of them all. The Creator is one of the many printers to be based off of the original Markerbot Replicator. It can use the same firmware as the Makerbots and even the same software (Makerbot Desktop, which works well). It is also open-source, so it is very easy to find information, replace parts, and use open source software like Slic3r or replicatorG. It can also print most materials with relative ease and had dual extruders which was great for multi-color prints. The print quality at 0.2 mm layer height is fairly good for an inexpensive printer.
The only downside that I saw with the Creator was that there would often be lifting off of the build plate due to uneven heat on the surface. Making large parts can be difficult because the build space is rather small and often there will be some problem like filament getting stuck or the material not sticking to itself. Most of these problems are easy enough to fix with software or with creative solutions. By far this printer exceeded my expectations and I would highly recommend it to beginners and advanced users alike.
Solidoodle 4 ($599)
4 Stars
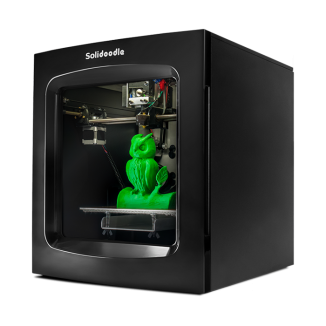
The Solidoodle 4 is another quality printer on the lower price range end of the spectrum. I particularly liked the enclosed build area and overall build quality of the printer. It was simple to fix any problems and had a great filament spool holder and feeding hole covered in rubber. There were never any filament feeding problems at all, which is great because pretty much every other printer gets jammed all the time. It also prints both ABS and PLA, which was good.
The downsides that I found with this printer included the software (Repetier Host) and the warped build plate. First, the software was very odd compared to other software out there. It gives you lots of control and can manually move the printhead which was nice. However, it was non-intuitive to use and had alignment issues. If you pressed the Home button multiple times, the printer would home each axis to different places. It also caused the printer to not print the object in the same place that you wanted it to be printed. This was frustrating, but even more so was the fact that the build plate that came with the printer was completely warped. Because there are only three adjustments screws under the plate, it was not possible to manually un-warp the plate, so we could only print small objects in the area that was not warped. Besides these small problems, we got very good quality prints at 0.2 mm layer height.
Makerbot Replicator 5th Generation ($2899)
3 Stars

Makerbot is probably the most well-known 3d printer company around, but I was not so impressed with the 5th Generation Replicator. There were a few positives that I found. First, the Makerbot Desktop software is very good (although it takes some time to learn how to customize it). It is very simple to use and can create an SD card x3g g-code file for other printers as well. I also liked the beautiful navigation screen and control wheel. It made it easy to do things like align and level the build plate. The build quality at 0.2 mm was mediocre and had a lot of bumpy edges, but certainly wasn't awful.
The negatives, however, were numerous. First off, you could only print PLA because the build plate was not heated. For an almost $3000 printer, that is pretty pathetic. I also hated the new "Smart Extruder". If by smart, they meant, gets jammed all the time, they did a great job. Also, the blue tape they give you is absolutely useless. From my experience, PLA does not stick to that stuff at all. Also, the fact that the material is hidden inside the machine is awful, especially because the shape of the Makerbot spools are not the same as anyone elses. If you want to use a 3rd party material, you have to make your own spool holder and hope that it works. Lastly, I even had alignment issues with the onboard software. The system thought the build area started in the middle and aligning it caused the print head to start bouncing off the wall repeatedly. It was awful.
Having said all of this, I would love to try out the Replicator 2, because I have heard much better things. But consider me unimpressed by this Replicator.
CubeX Trio ($3295)
1 Star

I have to say that I was most excited to try the CubeX Trio because of its specs. Huge build space, three extruders, great motors, high accuracy and so on. Boy, was I way off. This thing is a piece of junk. It seems like it is very well built, looks nice and has a seemingly great print head with fans. And the two full prints that I managed to make, came out pretty well. These are the only nice things I can say about this machine.
Here are the problems I faced using this printer. The software is horrible. It is hard to use, has basically no ability customize anything and worst of all, you cannot connect it to the printer. This means that you have to get everything right with the design and then put that design on the provided USB stick and plug it into the printer. There is a growing group of people who have switched over to Kisslicer (open source) and use a post-processor to convert the g-code to the .brb format that the printer reads. This was not simple to figure out and took me a very long time. Kisslicer, I will say, is a good program with a lot of functionality. The next problem is that the folks over at CubeX tried to do WAY too much with the onboard software. The leveling and alignment process is all in software, so inevitably there are problems with mechanical heights versus software heights. Now the company says that this printer can be used with PLA or ABS. If you use ABS, you should use the included glue stick because the build plate is not heated. Again, this is ridiculous for a three thousand dollar printer, but I digress. This glue is like superglue, especially with the plastic build surface. After finishing (or not finishing) any print, it would take me an hour or more to remove the print from the surface. This is absurd and frankly intolerable. But the worst part of this printer was the printing experience. The printer would heat up, start extruding into the waste bin, then do about ten movements around the build area for some reason. Then it would start to print, but it would print so slowly, that it was impossible to print fist sized object in less than 24 hours. I tried to adjust the speed with Kisslicer, but to no avail. Then came the extruder jamming problem. It seemed that every single print I ever did with the CubeX, the extruder got jammed. The worst part about the printer getting jammed was that the onboard software did not give you an option to pause the print and change the filament. IT JUST CANCELLED THE PRINT! So, again and again, I would waste hours on a seemingly good print only to have it fail in the middle and ruin my day. There were countless more problems with this printer, but these were the most pronounced. I would recommend no one ever buy a CubeX printer.